 Stitching Stitching
The key to successful bias sewing is to work with the stretch, not against it. Begin by staystitching any seam that will not hang vertically on the finish garment. This includes necklines, armholes, waistlines and asymmetrical seams. Do this before removing the stabilizer.
Garments cut on the bias fit differently than garments cut on straight grain. It is wise to baste the garment together, allow it to hang for 24 hours, and try it on before doing any permanent stitching. Hand-basting, using the follow technique, is essential. It guarantees accuracy for a good fit, and it provides the "give" to stitch ripple-free seams.
To baste two bias seams together:
- Working on a large, flat surface, pin the two garment sections, right sides together, with stitching lines matching.
- Leaving a 3" (7.5cm) unknotted tail, hand-baste the stitching lines together for
 about 6-8" (15-20.5cm), leave a small loop, to allow the fabric to stretch and repeat, until the entire seam is basted together. (E) about 6-8" (15-20.5cm), leave a small loop, to allow the fabric to stretch and repeat, until the entire seam is basted together. (E)
- When joining a bias edge to one with a straight grain, use this method to eliminate puckers:
- Before joining the bias edge to the straight grain edge, pin the bias section to a dress from or a padded hanger. Let it hang for at least two hours so the bias edge has time to grow.
- Remove the bias section and re-pin it to the pattern piece. Remark all of the symbols from the pattern piece.
- Hand baste the two sections together along the stitching line.
- Permanently stitching bias seams also requires some special handling:
- At the start of a seam, lower the presser foot to secure the fabric, then insert the needle.
- Because bias seam allowances tend to shrink during stitching, do not use the cut edge of the fabric as a stitching guide. Stitch along the basted stitching line.
- Gently stretch the fabric, putting one hand in front and one hand behind the presser foot as you sew.
- Stitch about 8-10" (20.5-25.5.cm), then stop with the needle in the fabric. Raise the presser foot, let the fabric relax, lower the foot and stitch again. Repeat until the entire seam is stitched.
- When stitching vertical seams, follow the pull of gravity, stitch from neckline to hemline. For necklines and horizontal seams, stitch from the center out.
- To avoid ripples, press each seam in the same direction as it was stitched.
- Once the seams is stitched and pressed, trim the seam allowances to 5/8” (1.5cm).
- When stitching and pressing, it is important to support the fabric so that its weight doesn't distort the shape of the garment.
Hemming
Bias-cut garments should hang at least twenty-four hours before hemming. This same rule applies to bias-cut sleeves. Let them hang before hemming or applying the cuffs. A narrow hem is the best choice for a bias-cut garment. This method works particularly well on lightweight fabrics:
Fold the garment up 1/8" (3mm) below the marked hemline; pin. Machine-stitch 1/8" (3mm) or closer, if you can, to the fold.
Using embroidery scissors, trim away the hem allowance above the stitching.
Fold the hem allowance up along the stitching line, rolling the stitching line just slightly to the inside of the garment. Using the tip of the iron, press gently, toward the 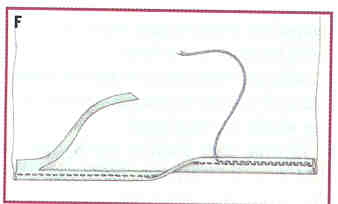 body of the garment, rather than back and forth along the hemline. body of the garment, rather than back and forth along the hemline.
Stitch again, close to the first fold; press. (F)
There is nothing quite so elegant and graceful as a bias-cut garment. Once you've experienced the joy of sewing and wearing one, you'll be a bias(ed) fan forever!
Vogue Patterns July/August 1997
|