|
Page 1 |
||
Cutting |
||
|
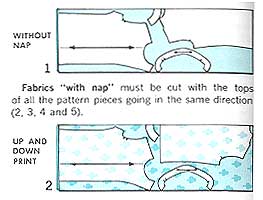
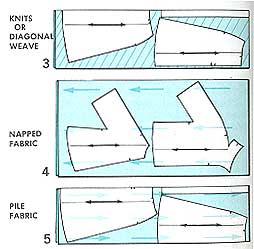
A mistake in cutting cannot be taken out like a badly sewn seam. In expensive fabric, it can be costly. The thing to do is to proceed without haste and make sure you have everything right before putting scissors to fabric. Follow all directions, study your pattern guide sheet, and take into account all indications on the pattern pieces themselves. You will find below a reliable procedure. Be sure your fabric is straightened and pre-shrunk, if necessary - PREPARING FABRIC FOR USE, Assemble everything you need: cutting surface (large table or cutting board), fabric, pattern, sharp shears, tape measure, yardstick ad small ruler, pencil, pins and pincushion, iron and ironing boards. PreparationPick out the pattern pieces you will use. Smooth out the pieces with a warm, dry iron, placing each new one on top of the pressed pile. Small pieces are cut apart. Grain line marks, should extend the entire length of pattern pieces; using a yardstick and pencil, extend grain line arrows on printed patterns. Selecting your pattern layout - On the pattern guide sheet, locate and circle your pattern layout for the selected view of your garment, for your pattern size, fabric width, and fabric either "with nap" or "without nap." Fabrics "without nap" have no up or down direction in design, weave, or texture, and may be cut with the pattern pieces placed in either direction, as long as they are on grain. Fabrics "with nap" must be cut with the tops of all the pattern pieces going in the same direction. This includes up and down prints (where the design has a upside down and right side up, i.e. you don't want the flowers standing on there heads), knits or diagonal weave, napped fabric, and pile fabric.
Sewing From A to Z by Coats & Clark |
||
|
|
||
|
|