|
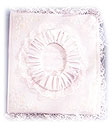 White satin and lace transform a 3-ring binder into an elegant album for wedding photos. White satin and lace transform a 3-ring binder into an elegant album for wedding photos.
Materials and Supplies
- One 3-ring binder
- 3/8 yard fleece
- 1/2 yard white satin
- 2 yards satin piping or narrow lace edging
- Oval picture frame base
- Glue
- Thread and stabilizer
Level of Difficulty: Beginner
Instructions
1. Use the opened binder to make a pattern by marking a section of satin the size of the binder plus 1/2" on the long sides and 3/4" on the shorter sides – but do not cut satin yet.
2. Using a water-erasable pen, mark the position of the spine on the satin. On the front portion, mark 1" in from all sides. Also, position the oval frame on the satin (the sample has it centered on the front) and trace the inside of the oval.
3. Using these markings, embroider a floral design on each corner (the sample used memory card SA305-Holiday). On the inside of the oval, embroider the names of the couple and the date of the ceremony. Add a floral border to the spine area (the sample used memory card SA304-Country Style).
4. When the embroidery is completed, cut out the cover piece. Carefully remove the markings with a slightly damp cloth.
5. Cut two additional satin pieces the size of the binder front plus 1/2" on all sides; these will be the inside covers for the front and back. Cut a strip of satin 3" wide and 32" long to cover the oval frame.
6. Cut fleece sections to match the binder front, back, and spine. Use spray adhesive to attach the fleece to the outside of the binder.
7. Using the zipper foot, baste the lace or piping around the outer edges of the cover with a 1/4" seam allowance, clipping the edge of the trim as needed to turn the corners. Overlap the ends.
8. On the inside sections, turn under 1/2" along one long side and topstitch in place. Embroider "Congratulations on your Wedding Day!" on the inside cover for the front (the sample used memory card SA305-Holiday). Re-hoop to include the date. Or you could use the wedding couple motif with the couple's names and wedding date. Wedding bells are also available. Optional: Embroider “Best wishes” and your name on one of these inside sections.
9. With right sides together, place the inside sections on the outside cover, having the finished edges of the inside covers toward the spine. Note that the spine area will be a single thickness of fabric. Stitch a 1/4" seam all around.
10. Trim the seam allowance in the corners and turn the cover to the right side. Slip the cover over the binder. Use white liquid glue to secure the finished inner edges in place.
11. Seam the ends of the satin strip together to form a circle. Stitch each long edge with two parallel rows of straight basting stitches, and pulling the bobbin threads, gather up strip. Wrap the gathered fabric around the cardboard oval, distributing the gathers evenly. Use white glue to secure the satin to the oval. When dry, glue the oval to the front of the covered album, centered over the embroidered names and dates. Embellish with tiny ribbon bows or silk flowers if desired.
6/05
|


