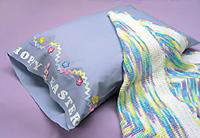
Here's the greatest project to create sweet dreams for your own favorite "bunnies." Let them help by cutting out, positioning, and spelling out the letters. Children love adding their own creative touches. It's a quick and easy "no sew" pillowcase.
1 pkg. Wrights® Pastel Jumbo Rick Rack (#117-404-002)
1 pkg. EZ® White Iron On Letters (#8811909)
Pillowcase (Color of your choice.)
Fabric Glue
Common Pins
Plastic Wrap
Instructions
1. Wash and dry pillowcase.
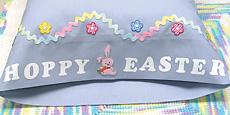
2. Cut out and arrange letters across the bottom of the open end of the pillowcase (see photo for placement). Hint: To form the two lowercase p’s in "Hoppy" so that they look the same, cut away the bottom half circle of the two uppercase B’s.
3. Iron on letters according to the manufacturer's instructions, leaving on the protective paper. Hint: Place a pin at the top of each letter to hold in place.
4. Iron on bunny appliqué between "Hoppy" and "Easter," following manufacturer's instructions.
5. Remove protective paper from letters.
6. Using the photo as your guide, pin rickrack around the pillowcase, starting and ending at the center of the back (lap and turn back the last edge for a clean finish).
7. Place a piece of plastic wrap inside pillowcase to protect the other layer from any glue seeping through. Glue rickrack in place and allow to dry.
8. Place gingham flower appliqués on pillowcase, using the photo for placement. Iron on appliqués, following manufacturer's instructions.


 Instructions