|
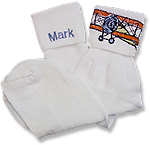
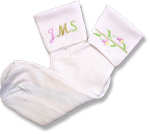
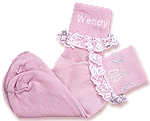 These socks are fun to wear and make great gifts for people of any age. They're also easy to create. Start with purchased socks and have fun personalizing each pair! These socks are fun to wear and make great gifts for people of any age. They're also easy to create. Start with purchased socks and have fun personalizing each pair!
Janome Supplies Needed
- Memory Craft 9000 or Memory Craft 5000
- Small Embroidery Hoop #2
- Clothsetter
- Janome Embroidery Thread
- Janome Bobbin Thread
- Memory Card #101 and Memory Card #102
These project instructions are specific to Janome machines; however, the project can be adapted for use on other machines.
 Materials Materials
- Purchased Socks
- Iron-on Tear-away Stabilizer
- Wash-away Fabric Marker
- Pins
Instructions
1. Set up the Memory Craft for Professional Style Embroidery. Insert Memory Card #101. Select the Edit Professional Style Embroidery Mode. Place desired colored embroidery thread in needle and bobbin thread in bobbin.
2. Select either the block or script letter style and the "S" (small) letter size. Program in the desired name.
3. Turn the cuff of the sock down to the desired length.
4. With a wash-away fabric marker, draw a line exactly where you will want your embroidery. Place an "Up" arrow pointing to the fold of the cuff.
 5. Turn the cuff up. You now have the sock right side out, with the placement mark on the inside of the cuff. 5. Turn the cuff up. You now have the sock right side out, with the placement mark on the inside of the cuff.
6. Cut a piece of iron-on tear-away stabilizer large enough to fit into the hoop and iron it on the outside of the part of the sock with the placement mark. The placement mark will be on the inside of the cuff.
7. Gently open up the cuff around placement line, leaving your embroidery area still pressed on to the stabilizer and stretching the cuff as far as you can; pin the cuff in place on to the stabilizer, so your embroidery area is free. Be very careful not to stretch the stabilized part of the cuff. The placement mark is now facing you.
8. Place the round hoop on the Clothsetter. Now place the stabilizer with the cuff attached in the center of the hoop, with the arrow pointing up, using the Clothsetter markings to make sure the cuff is straight.
9. Roll the sock up from the toe to where it is attached to the stabilizer, and attach the inner hoop making sure only the stabilizer is hooped. The sock will hang free, only secured by the pins and stabilizer.
10. Place the hoop on the carriage. Press the Edit Positioning Key and move the hoop by pressing the arrows to position the needle exactly where you want your name or design to start. Press OK and sew.
11. Leave the hoop on the machine. Remove Memory Card #101 and insert Memory Card #102. Select pattern #10. Press the Edit Positioning Key. Move to a clean area of the cuff. Press OK and sew.
12. Additional designs can be sewn to fill cuff area as desired.
12/05
|


