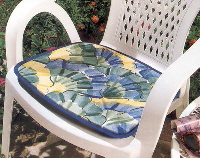
Summer stay-cations can lead to backyard fun. Make your stay-cation a little more comfy with cushy pads for your patio chairs. If your patio isn’t under cover, make sure to to choose an outdoor fabric for your project.
1. Make a paper pattern of the chair seat for which you want to make a covered pad by tracing the perimeter of the seat, and then round off all the corners. Cut the pattern, check fit, and label pattern “for fabric.”
2. Trace the pattern on a separate piece of paper, and mark a new cutting line 5/8” inside the traced line. Cut pattern on the inner marked line, and label pattern “for foam.”
3. Cut the pad top and the pad bottom from the decorator fabric using the “for fabric” pattern. Place “for foam” pattern on top of the polyurethane foam; trace using a marking pen. Cut foam on the marked line using rotary cutter or scissors.
4. Make or purchase bias tape in a matching or contrasting color. Press the tape into curved shape to match the shape of the pad. To prevent puckering, stretch tape slightly as you press.
5. Center foam on wrong side of pad bottom. Place pad top over foam, right side up. Match raw edges of fabric and pin together.
6. Machine-baste layers together, stitching 1/4” from raw edge, using a zipper foot. The seam allowance will be around the outside of the pad. Trim seam allowance if necessary, leaving enough of the seam allowance so that the bias tape can be attached.
7. Apply a small amount of fabric glue stick to the seam allowance of pad bottom. Open the bias tape, and finger press the wider side of the bias tape to the pad bottom, having the raw edges of the decorator fabric sitting along the fold of the bias tape. Overlap ends of bias tape about 1”.
8. Glue-baste the narrower side of the bias tape to the seam allowance of pad top. Where bias tape overlaps, turn under 1/4” at the end of the top layer of bias tape to form a finished edge. Glue-baste this finished edge in place, covering the under layer of bias tape.
Sewing Tip: Instead of glue-basting bias tape in place, hand wind fusible thread onto bobbin. Open bias tape completely. With right side of wider portion of bias tape placed against right side of bottom of pad, and with raw edge of bias tape aligned with raw edges of decorator fabric, stitch bias tape in place. Turn bias tape so that the raw edges of decorator fabric sit along the fold of the bias tape. Carefully press the folded edge of the bias tape to the line of fusible thread. Then topstitch in place.
9. With the narrower side of the bias tape facing up, stitch along inner edge of bias tape, using a zipper foot.