|
 Did you know that the salt used to keep roads and sidewalks clear in the winter can be harmful to your hound's paws? Have you ever noticed your dog doing the “cold foot shuffle” when you're walking him or her in the winter? Maybe you need to whip up a set of these simple paw protectors or winter boots! Did you know that the salt used to keep roads and sidewalks clear in the winter can be harmful to your hound's paws? Have you ever noticed your dog doing the “cold foot shuffle” when you're walking him or her in the winter? Maybe you need to whip up a set of these simple paw protectors or winter boots!
These instructions have been developed for greyhounds. Sizes may need to be adjusted to fit your dog.
Paw Protectors
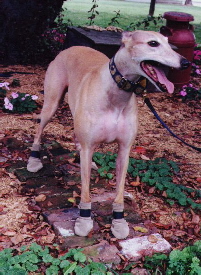 These simple-to-make paw protectors are great for: These simple-to-make paw protectors are great for:
- Keeping paws dry for dogs that don't like getting their feet wet in the rain
- Protecting paws when walking on rough or uneven surfaces
- Protecting paws from the heat of pavement in hot weather
- Protecting paws from salt and other chemicals used to melt ice and snow
- Keeping paws warm when walking in snowy or icy conditions
- Preventing damage from scratching when medical conditions such as skin allergies arise
Each set of paw protectors takes about 30 minutes to make.
Materials Needed
- 1/4 yard of strong, non-slip fabric such as cordura nylon, pack cloth, upholstery fabric, or suede
- Four 4” lengths of 1”-wide sew-in hook-and-loop tape
Instructions
 1. Cut 8 pieces of fabric in the shape shown below. Each piece should be about 4-1/4” wide and 7-1/2” tall. 1. Cut 8 pieces of fabric in the shape shown below. Each piece should be about 4-1/4” wide and 7-1/2” tall.
2. Sew the scratchy side of the hook-and-loop tape to the right side of 4 of the shapes about 4-1/2” from the rounded end.
3. Form four sandwiches with right sides together. Each sandwich should contain one piece with hook-and-loop tape and one piece without. In between these two pieces of fabric, insert the fuzzy side of the hook-and-loop tape with the fuzzy side facing away from the scratchy side of the hook-and-loop tape.
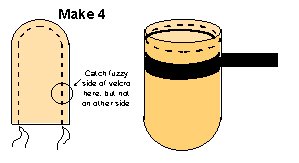 4. Sew around all but the short, straight side of the boot, using a 1/2” seam allowance. Be sure to catch one edge of the fuzzy side of the hook-and-loop tape in the seam, but leave the other edge free. 4. Sew around all but the short, straight side of the boot, using a 1/2” seam allowance. Be sure to catch one edge of the fuzzy side of the hook-and-loop tape in the seam, but leave the other edge free.
5. Turn each assembly right side out. Fold top edge over twice (once will do for suede) and topstitch to form finished edge on each boot.
6. To test the boots, slip them on to your dog's foot with the scratchy side of the hook-and-loop tape facing forward. Wrap the free, fuzzy strip of the hook-and-loop tape tightly around your dog's leg; it should fall above the “wrist” or “ankle” joint for best results. Now take a test walk. Paw protectors might twist on the foot, but they should not fall off.
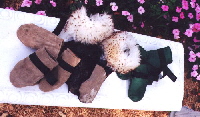
Winter Boots
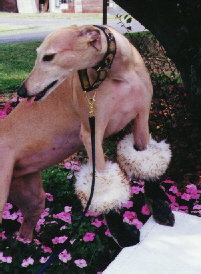 Since the paw protectors are relatively small, they may fall off in deep snow, not to be found until spring. They also have a tendency to twist while on the hound's foot. If you find this annoying, try making full winter boots. The ones pictured here have a decorative fur trim to really make a fashion statement. Each set of winter boots takes 30 to 60 minutes to make, depending upon materials and embellishments. Since the paw protectors are relatively small, they may fall off in deep snow, not to be found until spring. They also have a tendency to twist while on the hound's foot. If you find this annoying, try making full winter boots. The ones pictured here have a decorative fur trim to really make a fashion statement. Each set of winter boots takes 30 to 60 minutes to make, depending upon materials and embellishments.
To make the winter boots, follow the paw protector instructions, but make the shapes for the front feet 12-1/2” tall (rather than 7-1/2”). For best results, use two strips of hook-and-loop tape: one 4-1/2” from the toe (so it is just above the first joint), and one 7” from the toe (so it is just above the second joint). For the back paws, the shapes should be 16-1/2” tall with the hook-and-loop tape 4-1/2” and 12”from the toe.
1/06
|


