Materials needed
- Fabric
- 2.8 yards 45" quilted fabric
- 6 yards ruffled trim for edges
- 2 yards 1 inch wide green ribbon
- 2 yards 1 inch wide red ribbon
- 4 Christmas ornaments
- Notions
- Sewing thread to match quilted fabric
- Sewing thread to match trim
- Marking pencil
- Embroidery thread (see "Gift Box" design for list of colors)
- Download Gift Box embroidery design
These project instructions are specific to a Singer embroidery machines; however, they may be adapted to other brands of machines.
Instructions
Fabric Preparation
1. Cut a 45" X 50" piece of the quilted fabric.
2. From the remaining fabric cut a 6" X 50 " piece. You can use the leftover fabric to make Christmas stockings or other decorative items.
3. Assemble the 2 pieces of quilted fabric with a ½-inch seam. Press seam.
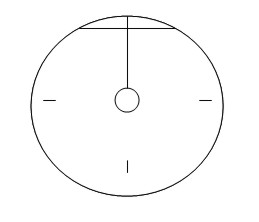
4. Fold your pieced fabric into 4, matching the corners.
5. Measure 24 ½-inches from the folder corner that has no raw edges and mark using a marking pencil all around the edge of the fabric.
6. Cut along the marked line to form a pie-shaped piece.
 7. Cut open one layer of the fabric that has the seamed piece running through it. 7. Cut open one layer of the fabric that has the seamed piece running through it.
8. Cut out the point of the folded corner that has no raw edges to form an opening for the tree trunk. Open up the tree skirt.
9. Mark the center front of the circle 7 inches from the bottom edge of fabric using a marking pencil.
10. Mark the 2 center sides of the circle 7 inches from the bottom edge of the fabric using a marking pencil.
Directions for completing the embroidery
1. Hoop your fabric positioning one of the center marks in the center of the hoop.
2. Send the "Gift Box" design to the machine.
3. Sew out the 7 color blocks of the design following the prompts from your machine or computer depending on what model machine you are using.
4. Sew out one design on each of the center marks. When completed you will have 3 "Gift Box" designs stitched out.
Sewing and finishing instructions
1. Set-up your sewing machine for a straight stitch and thread it up with the thread that matches your quilted fabric. Finish the raw edges of the tree skirt by turning the edge under ¼ of an inch and topstitching. Press seam. (If you have a serger, you can serge the edges rather than turning them under).
2. Attach the purchased ruffled trim all around the edges of the tree skirt using a straight stitch, starting from a corner and ending at that corner.
3. Mark center points 5 ½ inches from bottom edge between the designs, as well as the center points between the last design and the open seams at the back of the skirt.
4. Sew out 2 buttonholes side-by-side, 1-1/8 inches long at each center marking. (This is the longest buttonhole your 1-step buttonhole foot can make, so simply open the slide plate at the back of the foot as wide as it will go to get the 1-1/8 opening).
5. Use a seam ripper to slit open each buttonhole. 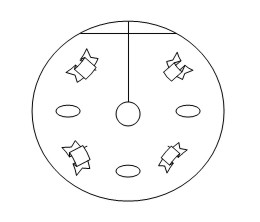
6. Cut each length of the red and green ribbon in 2, to form 4 1-yard lengths.
7. Take each ribbon and slip into buttonholes at each center marking and tie into bows. Alternate the colors so you have a red bow, green bow, red bow, etc.
8. Align the edge of the ribbon with the bottom edge of the tree skirt by cutting the end of the ribbon diagonally.
9. Attach purchased ornaments to each bow.
|