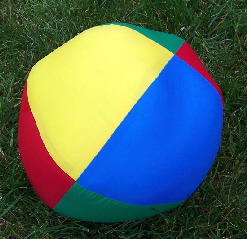
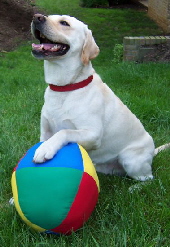
Both pets (and kids too!) will have fun playing with this colorful fabric ball, which is about 40” in circumference.
Project Note: This pattern was commissioned for Claire the cow, who loves to toss around a ball but needed a sturdier fabric model to play with. We hope you’re having fun now Claire!
Materials
3/8 yard durable fabric (such as rip-stop nylon or vinyl) in red, blue, green, and yellow
Thread that blends with fabric colors
Stuffing material (such as fiber fill, “beans” used for bean bags, rags, etc.)
Pattern (pdf) Note: Pattern pieces left and right must be overlapped before starting to create one pattern piece.
Directions
Note: All seam allowances are 1/2”
1. Using ball pattern, cut 2 pieces from each of the four colors.
2. For the top of the ball, sew un-notched edges together as follows: green to yellow; blue to red. Finger press seams open, or use a cool iron if fabric tolerates heat.
3. Place these two units right sides together, and sew un-notched edges together in a continuous seam, carefully matching seams at center top. Press seam allowances open as in Step 2.
4. Repeat Steps 2 and 3 with the four remaining pieces for the bottom of the ball, this time reversing the color positions (yellow to green; red to blue).
5. Pin the ball top and the ball bottom right sides together, orienting the sections so that red meets yellow and blue meets green, and matching notches and seams.
6. Sew seam, leaving a 5” opening. Turn ball right side out through opening.
7. Stuff ball with desired material. The ball can be stuffed so that it is firm or soft.
8. Slip stitch opening closed so it is quite secure.