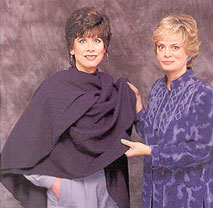
This sophisticated wrap can be a great fashion alternative, providing warmth and flair without the weight of a coat. Fabulous in fleece, doubleknit or interlock, this rounded rectangle also lends itself to just about any drapable, ravel resistant knit or knit-like woven. Best of all, it can be finished, fast, in one short sewing session.
Supplies
2 yards of 54"-wide or wider fleece, doubleknit, interlock or other ravel-resistant fabric
Thread to match (for conventional finishing) or overlock thread (for serged edges)
Optional: 2.5mm to 4.0mm double stretch needle for topstitching
Optional: pinking shears for finishing edges, if serger isn’t used
Create the Wrap
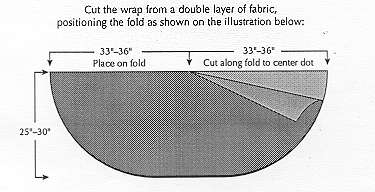
1. Cut out the wrap following the layout shown in Diagram A. The finished length, shoulder to hem, is about 33"; lengthen or shorten as desired. Finished width is 50" to 60"; widen or narrow as desired. Before finishing the edges (Steps 2 and 3), try on the wrap and make any necessary length or width adjustments.
2. Finish the wrap edges with serging or pinking.
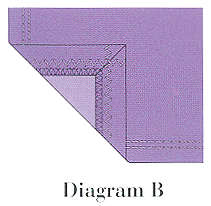
3. Turn up a 5/8" hem along the curved edge. Working form the right side and using a single or double needle, topstitch 1/2" from the hem fold (Diagram B).
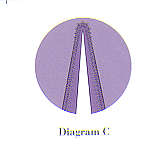
4. Turn up a 5/8" hem along the neckline opening edge, tapering and narrowing to 1/4"at the center point (Diagram C). Optional: At the front corners, fold the hem allowance diagonally to miter before topstitching.
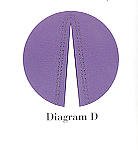
5. Working from the right side and using a single or double needle, topstitch 1/2" from the hem fold, tapering to 1/4" at the center point (Diagram D).


 4. Turn up a 5/8" hem along the neckline opening edge, tapering and narrowing to 1/4"at the center point (Diagram C). Optional: At the front corners, fold the hem allowance diagonally to miter before topstitching.